
Many people have complimented me on my frames and were surprised that I was finishing them myself. So here’s a brief guide on how I do it, and maybe you can too!
I start with unfinished frames that my local framer has assembled for me from either found frames or raw frame stock that I have. He charges me (2016) $10 or $15 to put them together. But sometimes I do this with frames I found at thrift stores or garage sales.
can I do the following steps:
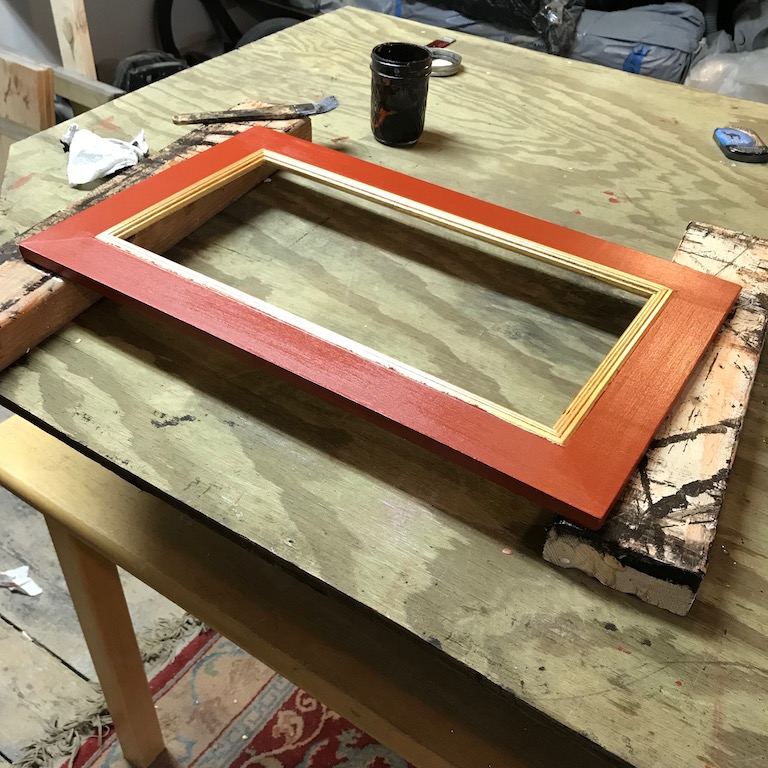
1. Sand and prime them with a normal latex wood primer.
2. Paint them with a burnt sienna acrylic paint. Two or three coats. Lightly sand if necessary.
3. Gold leaf on the inner edges. I use water-based “Wunda-Size”, and inexpensive composition leaf. Available at most art stores or even places like Michael’s.
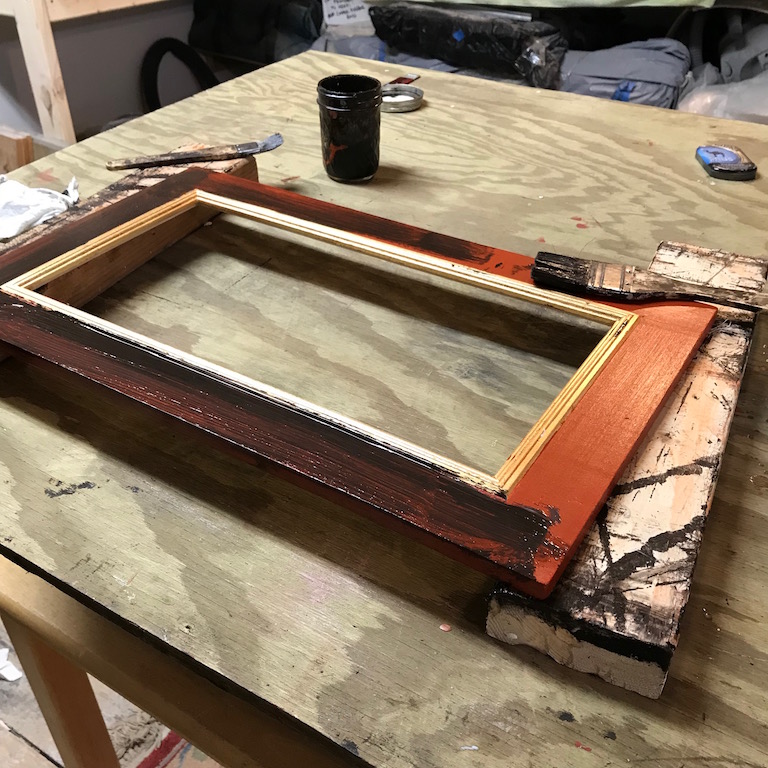
4. Apply a warm black paint finish. I mix burnt sienna and ivory black acrylic paint. The process I use is to first apply a coat of Golden brand acrylic glazing medium. Then I brush in the paint color, stippling it, and then smoothing it out so I cover everything. I work the brush back and forth until it looks good to my eye. I want to see some of the base red color coming through.
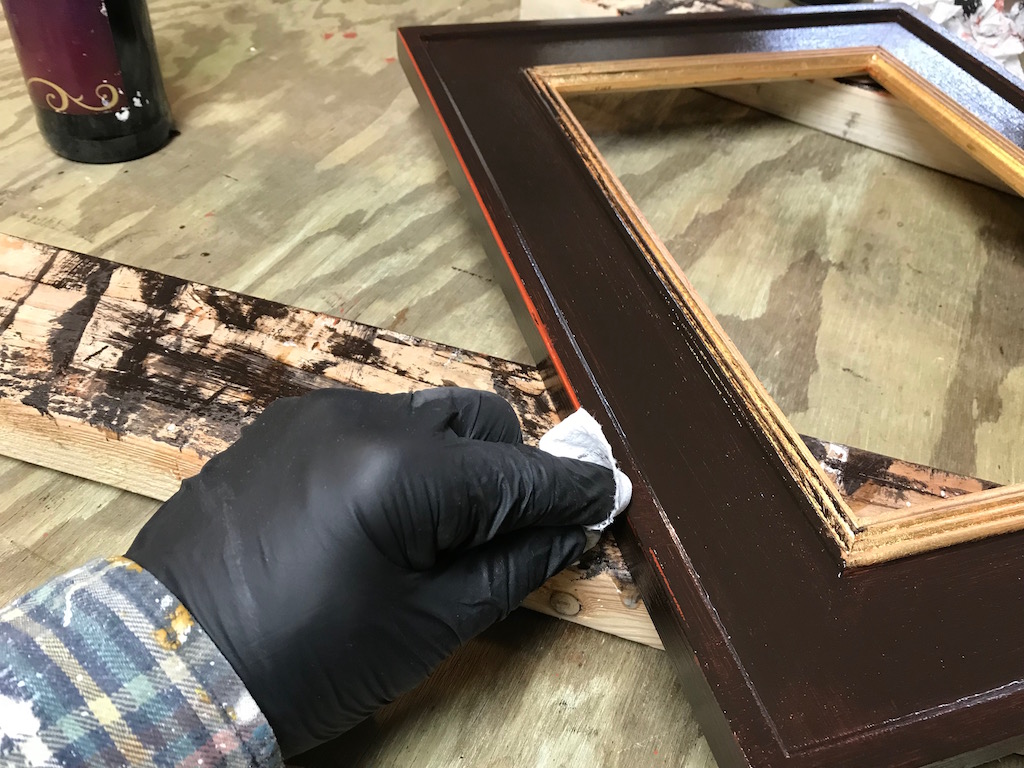
5. Now I take a tightly rolled paper towel or soft cloth. I start gingerly wiping off the gold-leaf. I carefully clean any raised areas on the profile of the frame that I want to highlight with the red base-color.
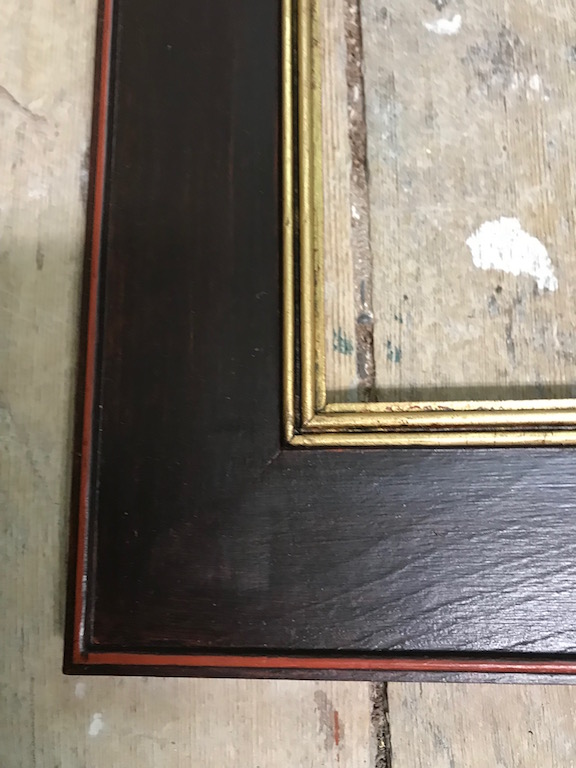
6. After it dries for about 24 hours, I then apply another coat of varnish over the entire frame. The final step is to put another coat of the golden satin glazing medium thinly over the entire frame. This step dulls the sheen. I have found that no matter which low-sheen varnish I choose, it’s still too shiny for my taste.
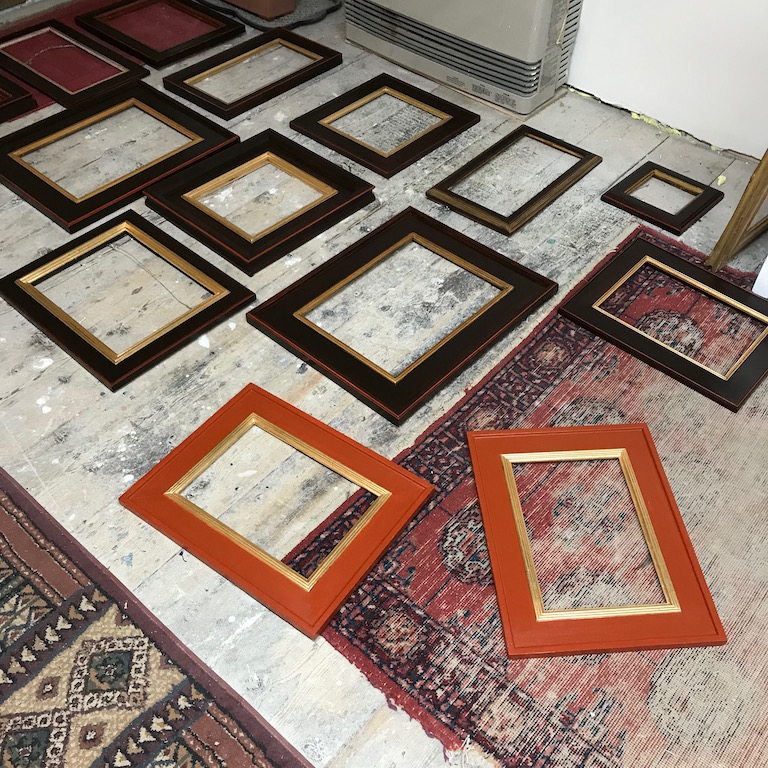
And we’re done. It probably takes a few hours to do each frame. I try to do many all at once because otherwise, the setup is very time-consuming for just one frame.
This system is a nice way to make a group of disparate frames consistent. And of course, you can use whatever colors you want.
